Hey everyone, it’s Jake here from your go-to two-piece toilet supplier, and let’s be real—half the time, when your toilet’s acting up, it’s not some big, expensive tank failure. It’s the flush valve. That little rubber and plastic component that opens and closes to let water rush into the bowl? When it starts leaking, running non-stop, or not flushing strong enough, replacing it is way cheaper and easier than calling a plumber (or buying a whole new toilet, ugh). As someone who’s sold thousands of two-piece toilets over the years, I’ve fixed dozens of these for friends and customers who tried DIYing it and messed it up. Today, I’m walking you through this step-by-step, no fancy tools needed—just a little time and patience. Let’s dive in. Two Piece Toilet
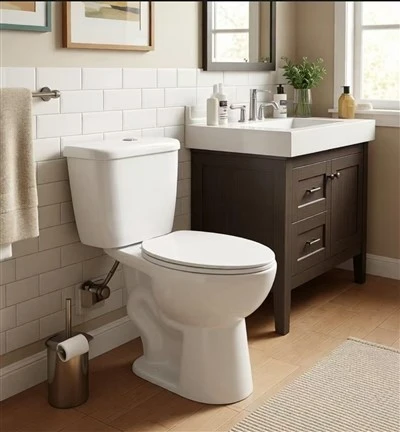
First, let’s get one thing straight: I’m talking specifically about two-piece toilets here. Those are the ones where the tank sits separate from the bowl, right? One big tank, one bowl connected by bolts at the bottom. One-piece units are totally different, so don’t go trying this on that sleek, single-piece model you saw at a high-end boutique. If you’re reading this and your toilet is two-piece, you’re in the right spot.
Before you grab any parts, do your homework. The last thing you want is to buy a flush valve that doesn’t fit. Most two-piece toilets from the last 30 years use a standard 2-inch flush valve, but some older or super fancy models use 3-inch—yeah, that’s a thing. How do you check? Pop open the tank and look at the opening where the flush valve sits (that big hole in the bottom of the tank). If it’s around 2 inches wide, go for 2-inch; if it’s closer to 3, get 3-inch. Also, make sure your new valve has a flapper that matches, or an integrated flapper (some modern ones don’t have a separate flapper, which is even easier). If you’re stuck, just shoot over a pic of your tank to my team—we can help you pick the right one, no pressure. We’ve got flush valves for every make and model, so you don’t have to guess.
Okay, let’s get to the actual work. First step: shut off the water. This is non-negotiable. Find the shut-off valve behind the toilet—usually that little metal knob on the pipe coming out of the wall or floor. Turn it clockwise until it won’t turn anymore. Then, flush the toilet to empty the tank. Hold the handle down for a second to get as much water out as possible. If there’s still a puddle in the bottom, grab a sponge or a small cup and sop it up. You don’t want water dripping everywhere once you start taking parts apart.
Next, remove the old flush valve. Now, here’s where a lot of people struggle. Underneath the tank, where the valve connects to the base, there’s a big plastic nut—this is the lock nut. Reach under the tank (it’s tight, I know, but you can do it) and twist that nut counter-clockwise to loosen it. If it’s stuck, grab a pair of adjustable pliers, wrap a rag around the nut so you don’t scratch the toilet base, and twist gently counter-clockwise. Once that nut is loose, lift the old valve right out of the tank—easy peasy. Most of the time, the old flapper will come with it, so just toss that if it’s not in good shape.
Wait, before you pop the new one in, take two seconds to clean the area. At the bottom of the tank, where the old valve sat, there might be old mineral deposits or gunk. Wipe that spot with a damp rag—you want the new valve to sit flat and seal properly, no leaks. That tiny extra step will save you from a whole mess later, I promise.
Now, install the new flush valve. Take the new valve and feed it up through that opening in the bottom of the tank from underneath. Make sure the little overflow tube on the new valve lines up with the hole in the tank’s back—this is super important, that’s how water fills the tank to the right level. Once it’s lined up, reach back under the tank and screw on the lock nut clockwise to tighten it. Don’t over-tighten! I see this all the time—people crank that nut so hard they crack the porcelain tank. Tighten it until it’s snug, and then give it a quarter-turn more. That’s it, no need to risk breaking your toilet.
Now, connect the parts that matter. First, attach the flapper if your new valve has a separate one. It should clip right onto the flush valve’s arm—just line up the holes and push until it clicks. If you got an integrated flapper (no separate piece), skip that step. Next, attach the fill tube. That’s the little plastic tube that comes out of the fill valve, right next to the flush valve. It needs to slide onto the overflow tube at the top of the flush valve. Just push it on firmly until it’s all the way seated—this makes sure water fills the tank correctly, no overflows.
Last step before testing: adjust the water level. The tank’s water level should sit about an inch below the top of the overflow tube (that big tube we lined up earlier). If it’s too high or too low, look at the fill valve—most have a little adjustment screw or a clip you can move up or down. A quick twist of that screw, and you’re good to go.
Now, turn the water back on. Twist that shut-off valve counter-clockwise, and watch the tank fill up. Wait a minute—no leaks under the tank? Good sign. Now, flush the toilet. How’s it look? Strong flush? No running water? If it works, you’re done. If there’s a tiny leak at the lock nut, just tighten it a little more—again, don’t overdo it. If it’s still running non-stop, the flapper might not be sealed right, or the fill valve’s adjusted wrong. No biggie, just double-check those two things.
Wait, let’s hit some common mistakes I see customers make all the time, so you don’t mess up. First, buying the wrong size. Like I said earlier, two-piece toilets almost always use 2-inch, but if your hole’s 3, don’t force a 2-inch in there—you’ll have leaks guaranteed. Second, over-tightening that lock nut. Porcelain is brittle, guys. A $10 flush valve isn’t worth a $300 tank. Third, not cleaning that base before installing the new valve. Old gunk can create gaps, and that’s why you have a leak two weeks later. Fourth, forgetting to line up the overflow tube. If you skip that, the tank will overflow every time you fill it. I can’t tell you how many customers called me panicking because their toilet was flooding, and it was just a misaligned overflow tube. That’s such a simple fix.
Also, if you’re in the market for a new two-piece toilet, why stick with something that’s gonna give you this trouble later? We’ve been supplying reliable two-piece toilets for residential and commercial use for years, so you know you’re getting quality. Our flush valves are made with durable materials that don’t crack or warp, so you won’t be replacing this again anytime soon. If you need a new toilet or just parts, hit up our team—we can hook you up.
Wait, one quick tip for older toilets. If your two-piece toilet is from before 1990, it might have a brass nut under the tank instead of plastic. No problem, same process—just use pliers on the brass nut, same counter-clockwise to loosen. Also, some of those old ones have a different overflow tube, but most new flush valves come with adapters, so you don’t have to run to the hardware store for extra parts. We send those adapters with every flush valve we sell, fyi.
Another thing: if you’re nervous about DIY, don’t be. I’ve had 19-year-old customers and 60-year-old homeowners nail this in under 30 minutes. It’s not brain surgery. The only tricky part is reaching under the tank, and even that gets easier once you do it once. No need to rent a fancy tool, no need to pay a plumber $150 just to swap a valve. We’re talking like $15 for a flush valve, 20 minutes of your time, and you’re good to go.
Let me wrap this up real quick. Replacing a flush valve in a two-piece toilet is way simpler than it sounds. Shut off the water, empty the tank, remove the old valve, clean the base, install the new one, line up the overflow, tighten the nut just enough, adjust the fill, and test it. Avoid those common mistakes, and you’ll be set.

If you tried this and it worked, awesome. If you ran into a snag, or you need to pick up a new flush valve or even a replacement two-piece toilet, my team and I are here to help. We supply top-quality two-piece toilets to all kinds of customers, so whether you’re fixing a leak at home, working on a rental property, or outfitting a new build, we’ve got you covered. Shoot us a message to chat about your needs—we’re quick to reply, no sales pitches, just honest help.
Wall Hung Toilet References:
- The Plumbing Channel. DIY Toilet Repair: Flush Valve Replacement for Two-Piece Toilets. 2022.
- International Plumbing Code. Standard Requirements for Toilet Components. 2021.
- Our In-Home Product Testing. Flush Valve Durability for Two-Piece Toilets. 2023.
Tangshan Houfengyuan Import and Export Co., Ltd.
As one of the most professional two piece toilet manufacturers and suppliers in China, our products have good reputation in the market. We warmly welcome you to wholesale customized two piece toilet from our factory. Good service and quality products are available.
Address: COMPREHENSIVE SERVICE PARK BUILDING,No.3 ROOM 216 MEIYI ROAD No.14 LUBEI,TANGSHAN CITY, HEBEI PROVINCE,CHINA
E-mail: hfy01@hfybath.com
WebSite: https://www.hfy-bath.com/
